Creating Operational Risk Assessments
- Kyle Gray (Unlicensed)
- Dan Le (Deactivated)
- Tim Hampton (Unlicensed)
Air Maestro’s operational risk assessment function allows organisations to create online risk assessment forms, which calculate the risk for the applicable activity. The operational risk assessments can then be used before each flight/mission/activity to determine the risk associated with conducting the task and consequently whether it is advisable to continue the task.
The process for creating an operational risk assessment requires three steps:

Step-by-step guide
Step 1: Create a Risk Assessment Type
You can create multiple risk assessment types (for each department, task etc) based on your company requirements. Each risk assessment type can evaluate a unique set of criteria, pertaining to the task/function.
Select
 Setup > Select Operational Risk Assessment Setup under Operations. The Risk Assessments tab is displayed.
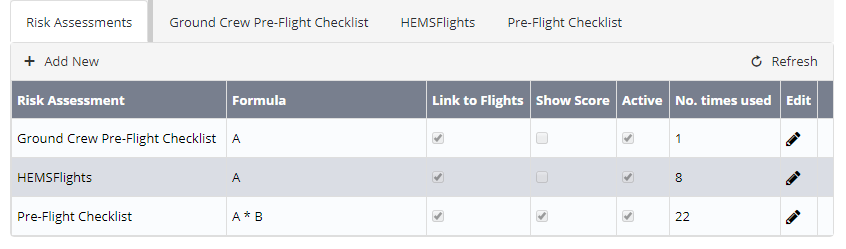
- Click [+ Add New].
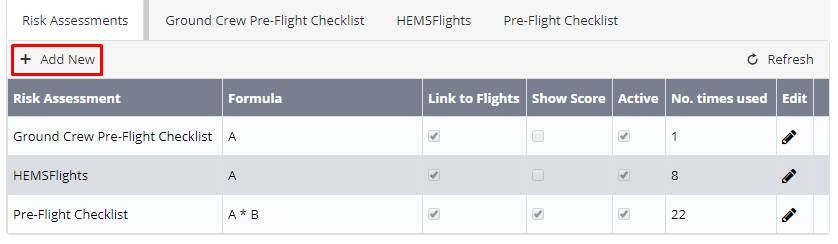
The Risk Assessment tab displays a new row: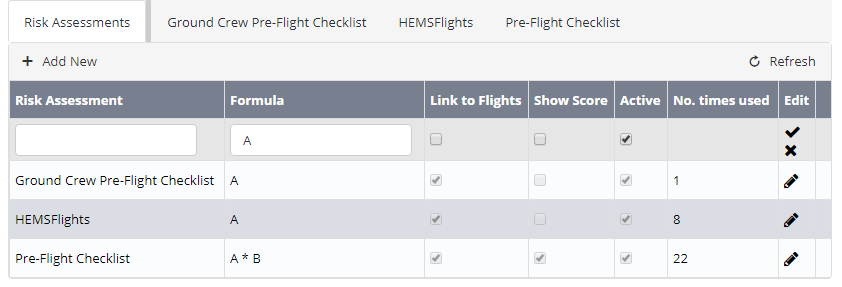
Complete the applicable fields.
Field
Description
Risk Assessment
Enter a name for the risk assessment.
Formula
Enter the formula associated with this risk assessment. For example, if the risk assessment total is calculated by summing the sub totals of the headers enter A+B. If the risk assessment total is derived by multiplying the sub total of each header enter A*B. If the risk assessment consists of a single header, enter A.
Link to Flights
Select the Link To Flights tick box to include the Aircraft, Pilot in Command and Flight Date fields in the risk assessment form.
Show Score
Select the Show Score tick box to show the score associated with the completed risk assessment in the risk assessment form.
Active
Select the Active tick box for the risk assessment to be immediately available to personnel with the required access level.
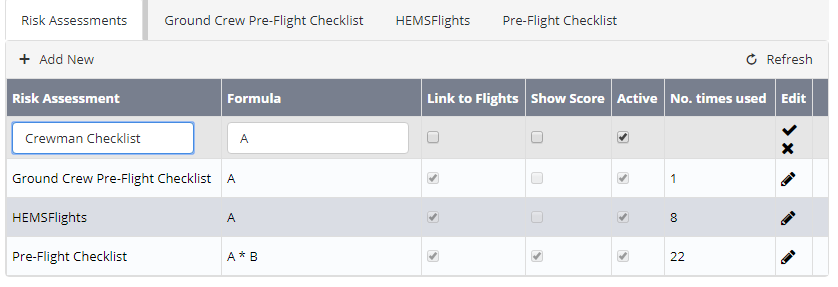
- Click [
 ]. The new risk assessment is added to the tab strip.
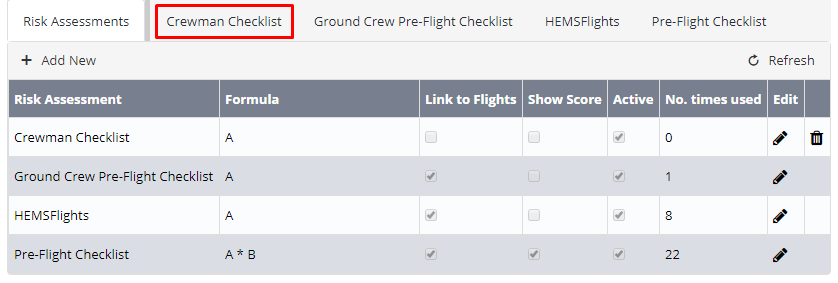
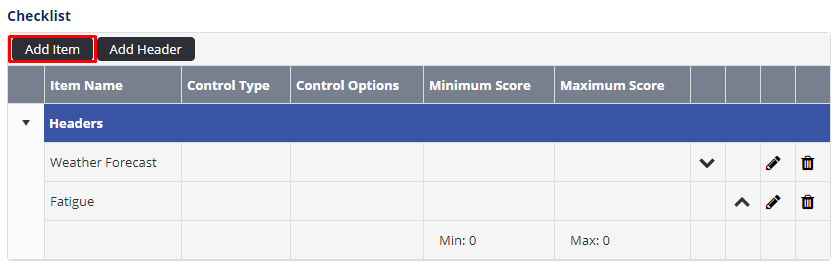
Step 2: Create a Checklist
A checklist is a set of one or more evaluations assessed within the operational risk assessment. All checklist items must be grouped under a header. For this reason, a header must be created before any checklist item. The text in the header should reflect the checklist items that will exist below it.
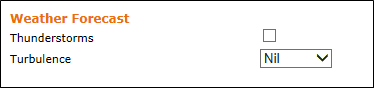
For example, the header ‘Weather Forecast’ would be appropriate for a group of checklist items used to evaluate the expected weather conditions for the flight.
In the example below, the text ‘Weather Forecast’ is a header item in a checklist, while the text ‘Thunderstorms’ and ‘Turbulence’ are checklist items. The checklist item may consist of label, checkbox, checkbox list, radio button list or drop-down list. In the example below, the ‘Thunderstorms’ item is check box, while the ‘Turbulence’ item is a drop-down list.
- Select Setup > Select Operational Risk Assessment Setup under Operations.
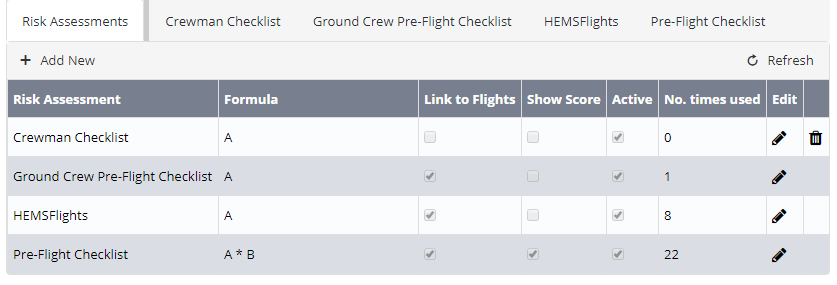
- Select the tab corresponding with the required risk assessment.
The Checklist and Risk Bands panes are displayed.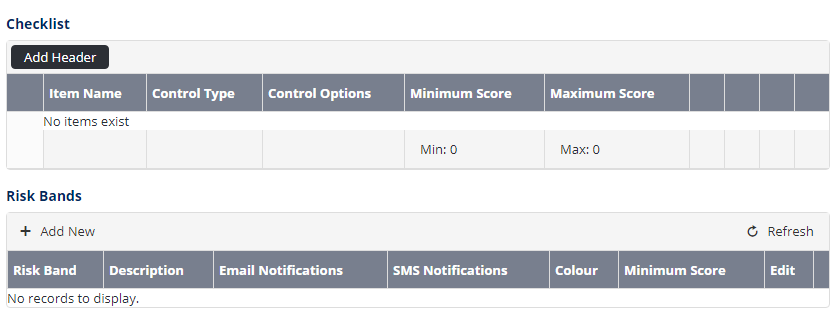
- Click [+Add Header] in the Checklist pane.

Enter a descriptive title for the header in the Header text text box.
Enter the required formula in the Formula Group text box.
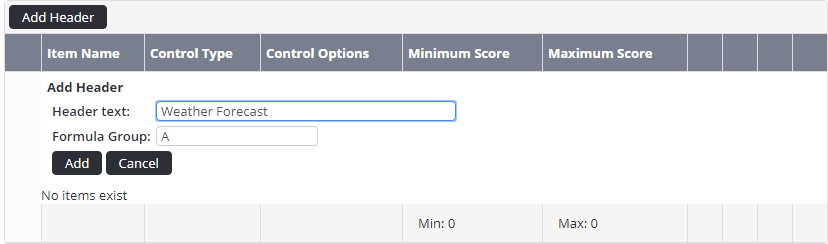
Click [Add].
Repeat Steps 3-6 to continue adding additional headers to the checklist.
Click [Add Item].
Enter a meaningful name for the checklist item in the Item name text box.
Select the applicable header for the checklist item from the Header drop-down list.
Select the applicable control type from the Control Type drop-down list.
Control Type
Description
Label
Select the Label control type to include a text label within the operational risk assessment form.
Checkbox
Select the Checkbox control type to include a check/tick box for the checklist item. This control is used to indicate whether the criterion specified by the checklist item is present.
Checkbox List
Select the Checkbox List control type to include a series of check/tick boxes for the checklist item. This control is used when one or more options may apply to the checklist item.
Radio Button List
Select the Radio Button List control type to include a series of radio buttons for the checklist item. This control is used where the user is required to select a unique option from a series for the checklist item.
Dropdown List
Select the Dropdown List control type to include a predefined list with a series of options for the checklist item. This control is used when the information to be entered into the checklist item is limited to particular words and phrases and only one option may be selected.
Complete the applicable fields associated with the selected control type. For example, for the dropdown list control, you must enter each list item and the score applicable to each item.
Click [Add].
Repeat Steps 8-13 to continue adding additional checklist items to the checklist.
Step 3: Setup Risk Bands and Notifications
- Select Setup > Select Operational Risk Assessment Setup under Operations.
- Select the tab corresponding with the required risk assessment.
The Checklist and Risk Bands panes are displayed. - Click [+Add New] in the Risk Bands pane.

Enter a descriptive title for the risk band in the Risk Band text box. For example, High, Caution, Low, Abort Flight, Seek Approval etc.
Enter a description of the risk band in the Description text box.
Select the colour to represent the risk band from the Colour picker.
Enter the minimum score that must be reached to trigger this risk band in the Minimum Score field.
Select the users who must receive an email notification when the risk band is reached in the Email Notifications list.
Select the users who must receive an SMS notification when the risk band is reached in the SMS Notifications list.
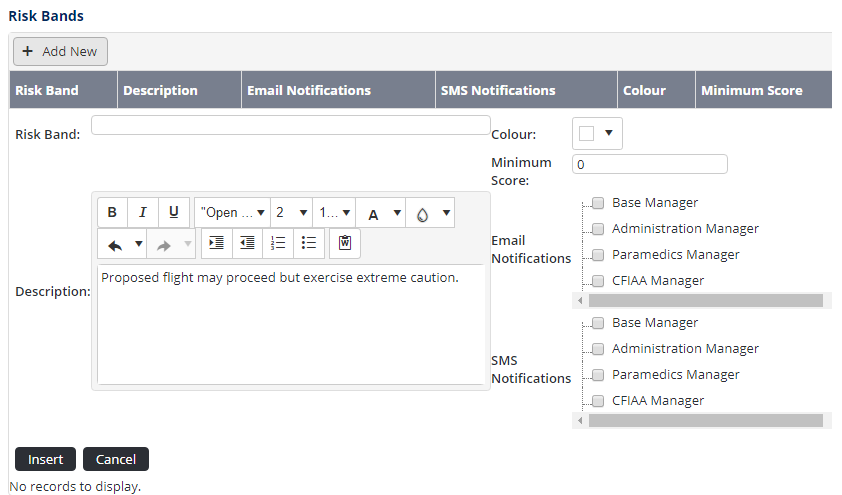
Click [Insert].
Repeat Steps 3-10 to continue adding additional risk bands to the checklist.
Video Guide:
Related articles
Operational Risk Assessment Module Guide: