Setting up Audit Options
- Kyle Gray (Unlicensed)
To use the audit module effectively, you must first setup the audit categories, roles and schedule according to your organisation’s requirements.
The process for setting up your organisation’s audit options requires six steps:

Step-by-step guide
Step 1 - Setup Audit Finding Categories
Air Maestro contains customisable finding categories that administrators can setup to meet organisational requirements. It is best practice to setup the categories during the initial system setup to prevent the corruption of audits. Audits created based on the current categories might be affected if the categories are significantly altered.
Select Safety > Setup > Audit Options. The Audit Settings and Options screen is displayed.
- Select the Categories tab.
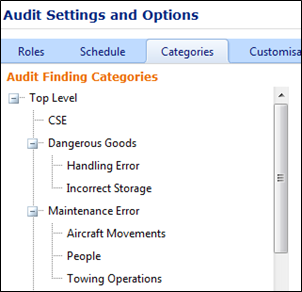
Right-click on any item in the Audit Finding Categories tree and select Add. The Add Finding Category dialog box is displayed.
Enter the name of the new category in the Category Name field.
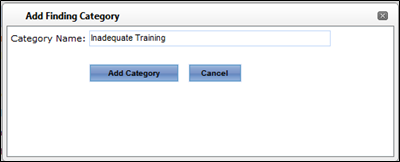
Click [Add Category]. The tree is updated with the new category.
 To change the order and grouping of the categories, click the required category and drag it to the required location.
Step 2 - Setup Audit Categories
- Select Safety > Setup > Audit Options. The Audit Settings and Options screen is displayed.
- Select the Categories tab and scroll to the Audit/Hazard Area tree.
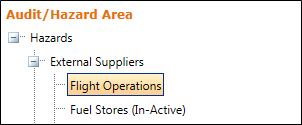
Right-click on any item in the Audit/Hazard Area tree and select Add Hazard Area. The Create New Hazard Area dialog box is displayed.
- Enter the name of the new category in the Hazard Area Name field and select the parent hazard area.
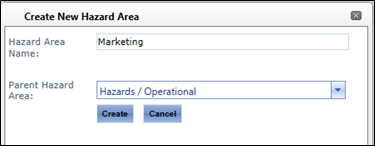
Click [Create]. The tree is updated with the new category.
To change the order and grouping of the categories, click the required category and drag it to the required location.
Step 3 - Setup Audit Roles
Before you start using the Audit module, it is imperative that you setup the users who can conduct and sign-off audits in your organisation. You should also define the auditors who have visibility over all the audits in the system.
Select Safety > Setup > Audit Options. The Audit Settings and Options screen is displayed.
- Select the Chief Audit Officer and Audit Officer from the relevant drop-down lists and click [Set Role]. These users have visibility and modification rights for all the audits in the system.
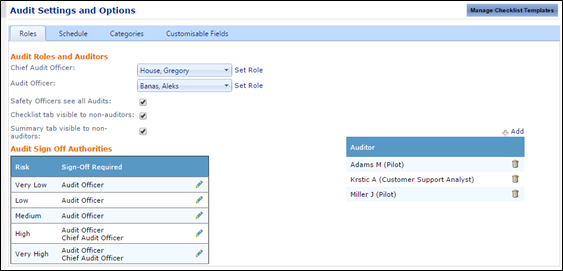
- Select whether safety officers (Chief Safety Officer, Flight Safety Officer etc.) are automatically able to view all audits in the system regardless of their assigned access levels.
Select whether personnel who are not the auditors of the audit can view all the items in the audit checklist or just the checklist items relevant to their assigned action/s.
Select whether personnel who are not the auditors of the audit can view the audit summary.
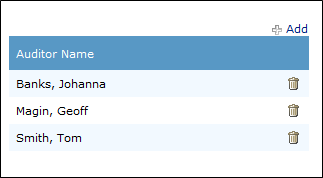
Click [+Add] in the AuditorName pane.
Select the auditor’s name from the drop-down list and click [Insert].
- Repeat Steps 5-7 for all auditors in your organisation.
Click Edit [
 ] in the Audit Sign Off Authorities pane for the required audit risk rating.
Select the names of required sign-off personnel for all audits matching the risk rating and click [Update].
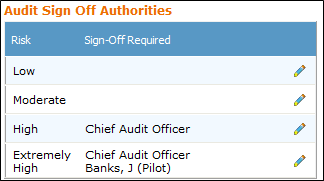
Repeat Steps 8-9 for all remaining audit risk ratings.
Step 4 - Setup Audit Views
The Audit Schedule can be displayed in the Quarterly, Monthly or Rolling Monthly view.
Select Safety > Setup > Audit Options. The Audit Settings and Options screen is displayed.
Select the Schedule tab.
- Select the preferred display for the schedule from the Select Calendar View drop-down list.
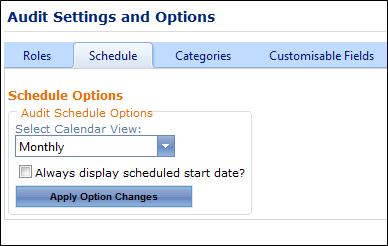
Select whether the audit must be displayed in the schedule according to the scheduled start date. If this option is unselected and your audit is scheduled to commence in March, but the actual start date becomes April, the audit is displayed in April in the AuditSchedule screen.
Step 5 - Setup Compliance Status
Compliance Statuses are used when conducting an audit to assign each audit checklist item a compliance status.
Select Safety > Setup > Audit Options. The Audit Settings and Options screen is displayed.
Select the Customisable Fields tab.
Select the Compliance Status option from the drop-down list and a grid with all the different Compliance Status is displayed.
Click the [
] to edit any of the attributes of a compliance status.Field
Description
ComplianceStatusID
A unique identifier used by the Air Maestro system to distinguish between the different compliance statuses.
ComplianceStatusName
The name of the compliance status.
ComplianceStatusColour
The colour of the compliance status in hex color code.
ShortName
The short name for the compliance status. The short name is used as the text for the shortcut button.
ShortcutAllowed
An option to enable or disable the shortcut button. The shortcut button appears in the audit checklist and allows auditors to set the status of an audit checklist item to the applicable compliance status without having to proceed to the audit screen.
ForceFinding
An option to enable or disable the functionality to automatically prompt the auditor to add a finding when they set the status of an audit checklist item to the applicable compliance status.
FindingName
The default name of the finding. The finding name is used as the name of the finding when the force finding option has been enabled.
Click the [Add Record] button to add a new compliance status. A new row in the compliance status grid with blank fields in each column is displayed.
Click the [
 ] to confirm the addition of the new compliance status OR click the [
 ] to cancel the addition of the new compliance status.
Step 6 - Setup Audit Classes
Audit Classes are used to group/categorised the different audit areas in the Audit Schedule.
Select Safety > Setup > Audit Options. The Audit Settings and Options screen is displayed.
Select the Customisable Fields tab.
Select the AuditClass option from the drop-down list and a grid with all the different Audit Classes is displayed.
Click the [
] to edit any of the attributes of a compliance status.Field
Description
AuditClassID
A unique identifier used by the Air Maestro system to distinguish between the different audit classes.
AuditClassName
The name of the audit class.
Click the [Add Record] button to add a new audit class. A new row in the audit class grid with blank fields in each column is displayed.
Click the [
] to confirm the addition of the new audit class OR click the [] to cancel the addition of the new audit class.
Related articles
Auditing Module Guide: