Step-by-step guide
- Select
 Library from the main menu. The Document Library screen is displayed.
 - Browse to the required location for the new document.
 Before uploading a document, ensure that the file name is meaningful. It must be succinct, but descriptive. This file name is displayed in the library.
 - Click
 . The Upload File dialog box is displayed:
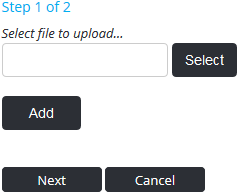
 If the icons shown here are not visible, you do not have permission to edit this folder. Refer to Assigning Folder Permissions for more information.
 - Click
 . The File Upload dialog box is displayed.
 - Browse for and select the required document.
- Click [Open]. The path to the document is displayed in the Upload File dialog box.
- Click
 . Step 2 of the Upload File screen is displayed.
 - Enter the reference number for the document (if applicable) in the Reference No text box.
- Enter any comments relating to the document in the Description text box.
- Select the category which best describes the document from the Categories field.
- Click
 . The new document is added to the library.
Video Guide:
Related articles
Document Library Module Guide: