Beginning with Air Maestro v3.6, it’s possible to sync your Air Maestro “My Schedule” with external calendar applications.

Step-by-step guide
On the Air Maestro home page, you can either select the Setup option underneath the “My Schedule” calendar heading or select My Profile > Schedule to create a webcal link.
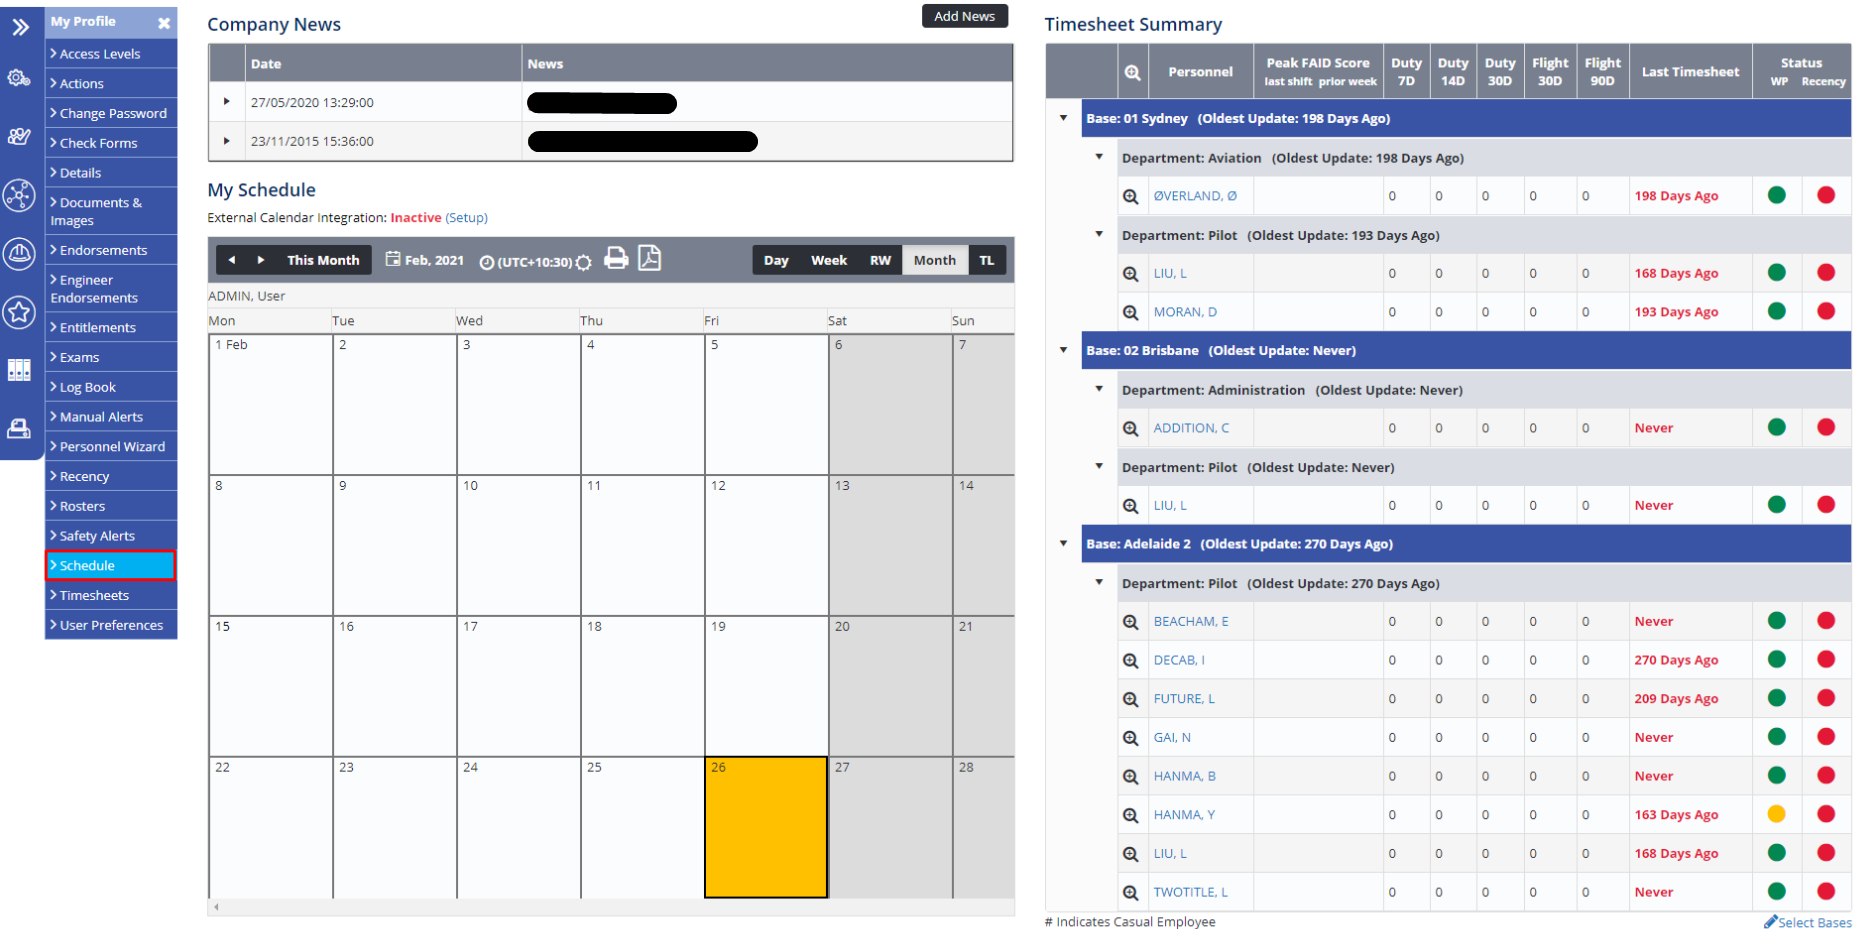
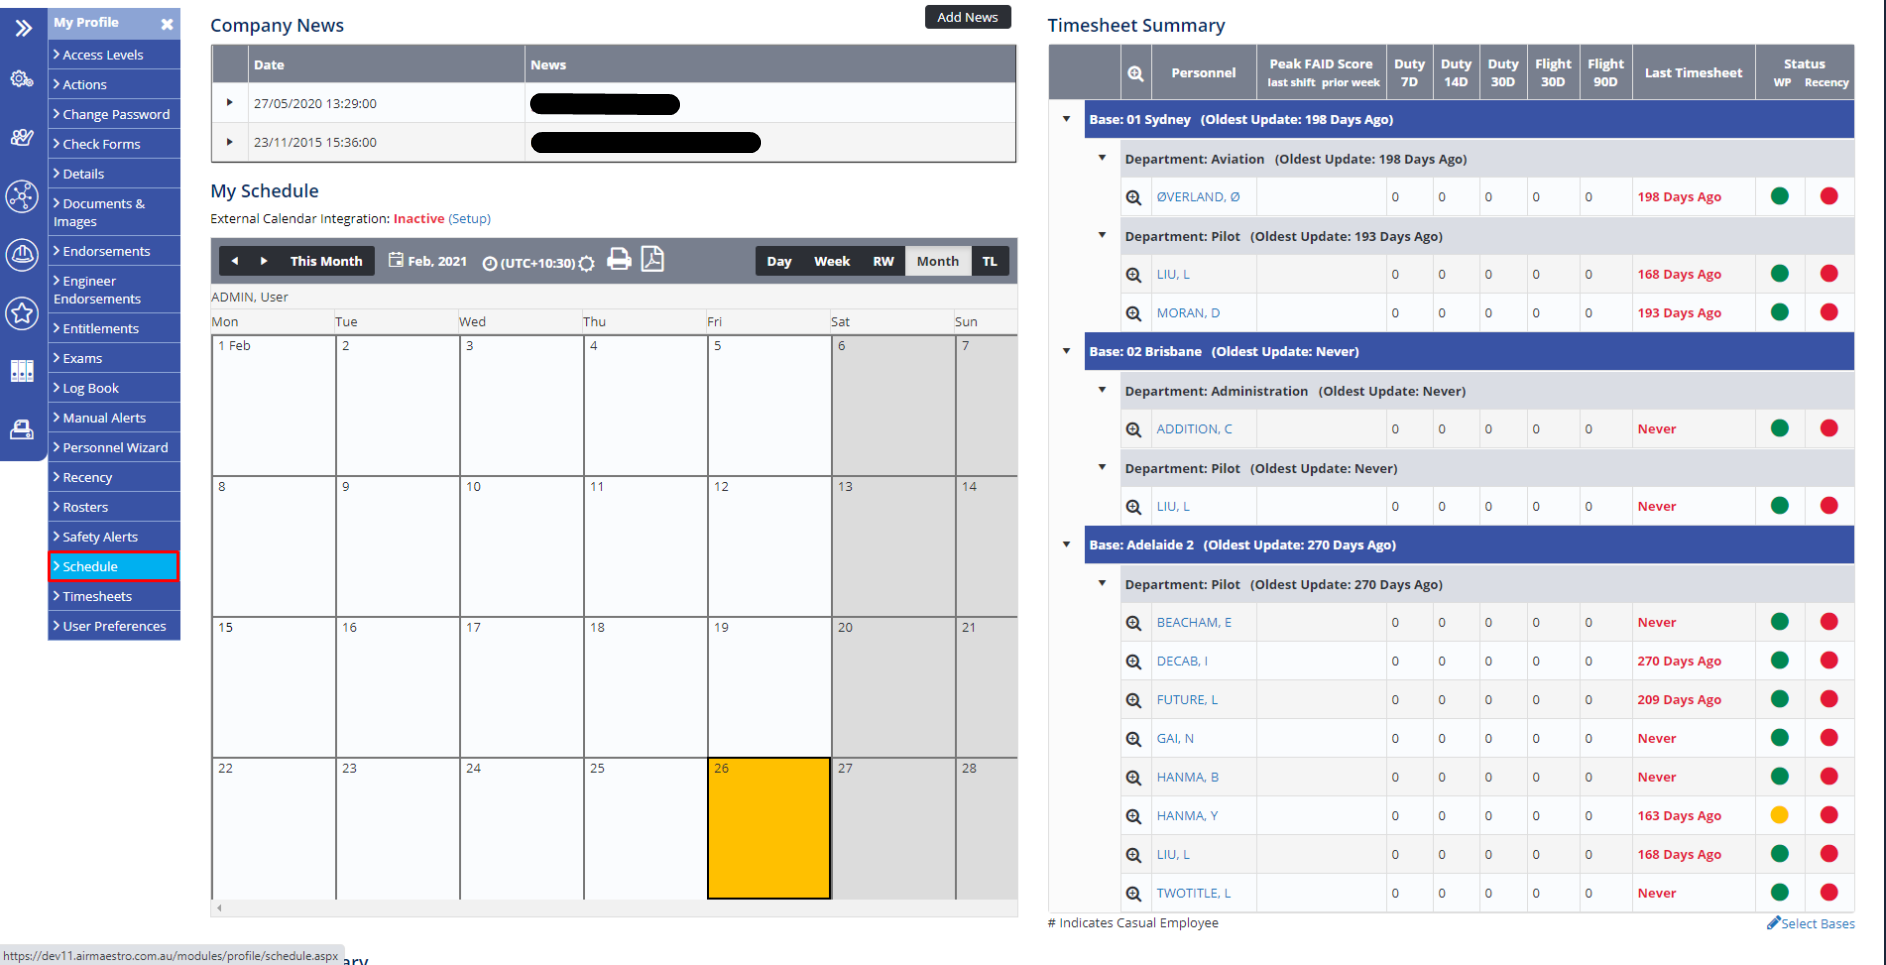
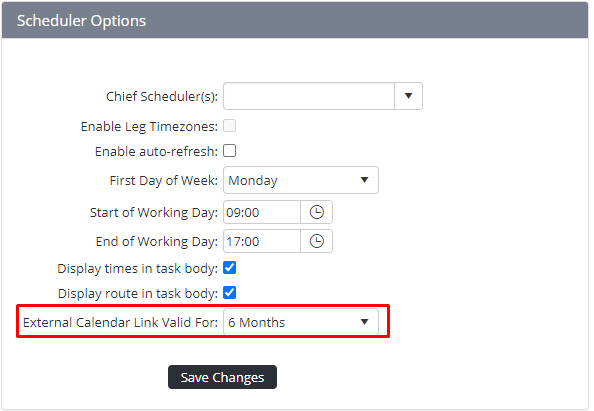
From the “Schedule” page, granted sufficient access, you will be able to select “Generate New Link” within the box labelled “External Calendar Integration”. Upon selecting this option you are able to see a webcal link, the date it was issued, and the expiry date (configurable within the Schedule Global Setting).
Once this link is generated the user whose profile you are activating this functionality for will receive an email. Upon clicking the generated link you will be asked which application you wish to use for this integration.
If you select the “Reissue” button it will reapply the expiry period using the current day, whilst selecting remove will disable the integration and remove the webcal link.

Subscribing to a web calendar using different calendar applications
Outlook Desktop
Open your Outlook desktop client
Go to your calendar by clicking the calendar icon in the bottom left of Outlook

Right click ‘My Calendars’ then go → Add Calendar → From Internet
You will be prompted with a popup dialog, put your generated calendar link in the text box
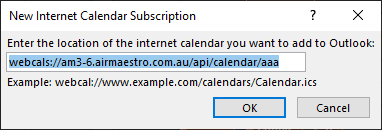
Press ‘Ok’
You then will get a window asking if you would like to add the calendar
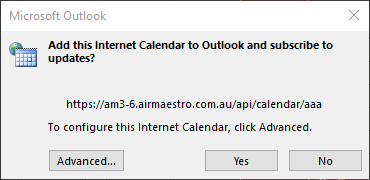
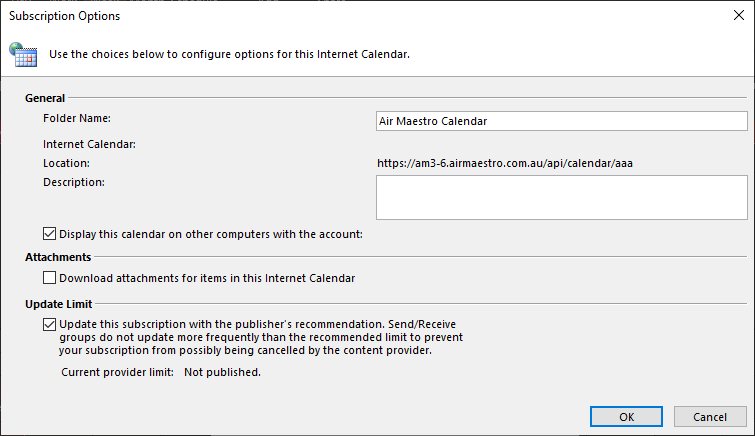
You can press ‘Advanced’ to set advanced settings on the calendar like the name (Folder Name is the calendar name)
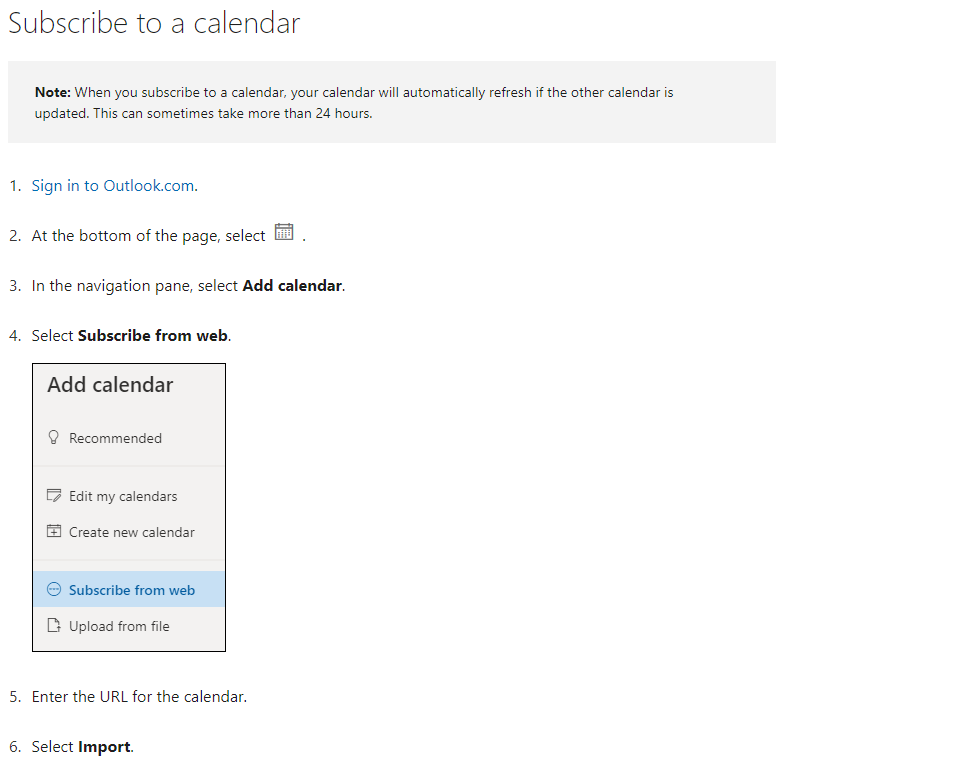
Outlook Web
Thunderbird
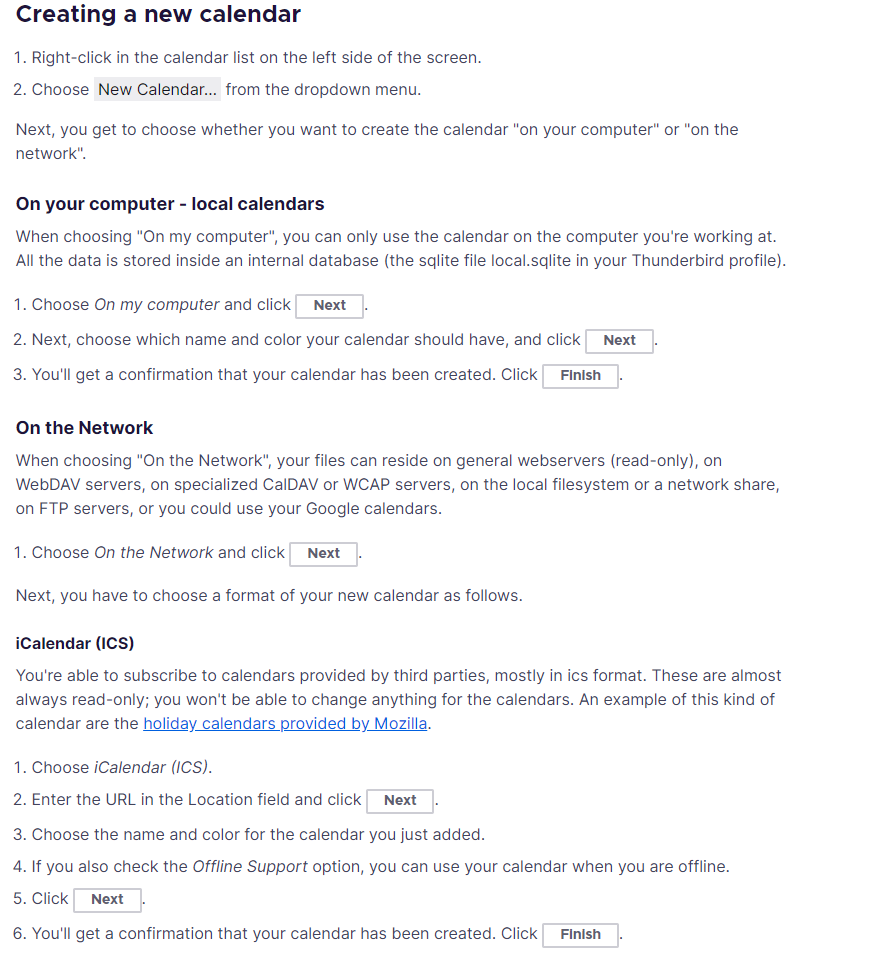
Note: You may need to close and restart the application in order for the integration to successfully apply.
Google Calendar
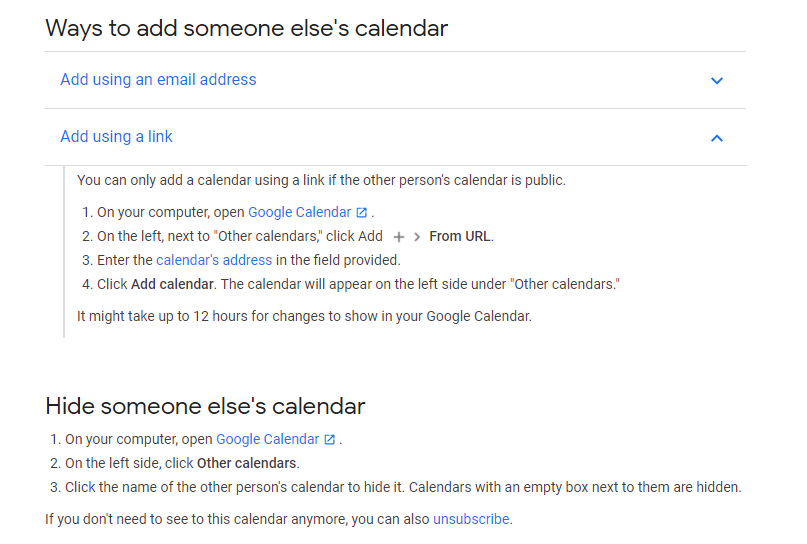
Note: Google Calendar takes roughly 12 hours to update it’s information.
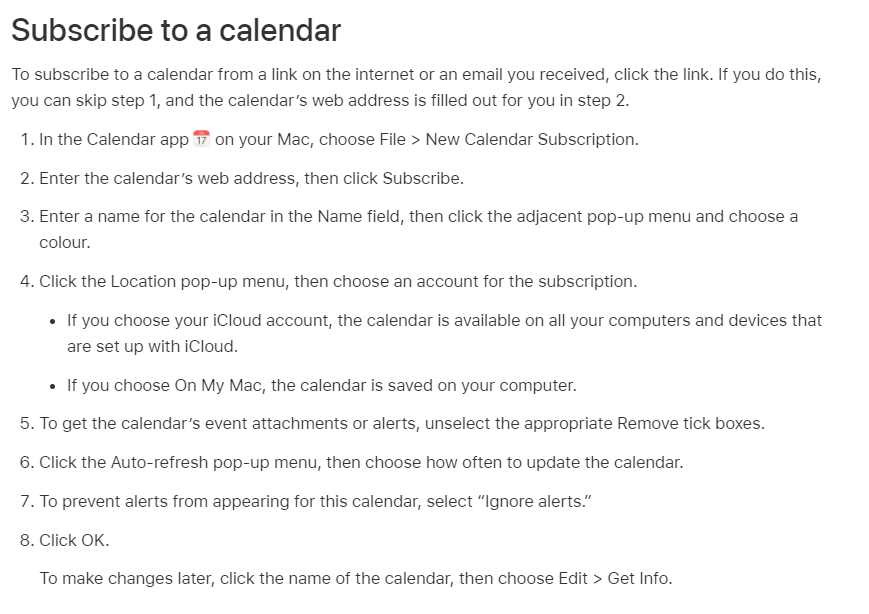
Apple Calendar
