Air Maestro allows you to create custom endorsement attributes with custom attribute types.
Step-by-step guide
Select Manage > Setup > Engineering
 Setup> Select Engineering Setup under Operations. The Engineering Setup screen is displayed.
- Scroll to the Engineering Endorsements Attributes pane.

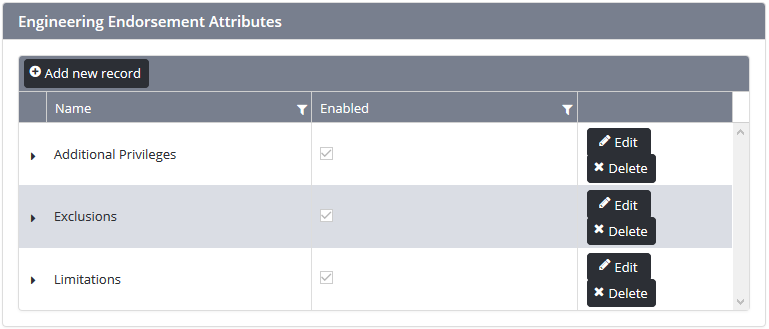
- Click [Add New Record]
 . A new row is displayed in the grid.
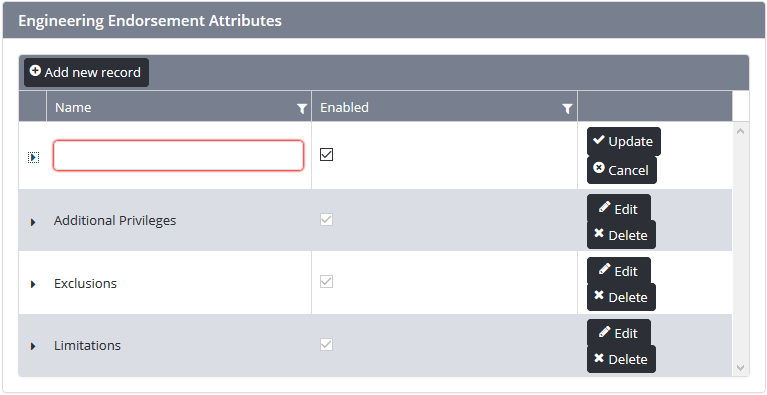
Enter the name for the endorsement attribute in the Name text box.
Select the Enabled tick box if you wish the endorsement attribute to be active and usable. If the Enabled tick box is unselected, the endorsement attribute will be inactive and unusable.
Click [Update]
 . The grid is updated with the new endorsement attribute.
Repeat Steps 3-6 to add additional endorsement attributes.
Click the [
 ]
]  to expand the required endorsement attribute. A new endorsement attribute type grid is displayed.
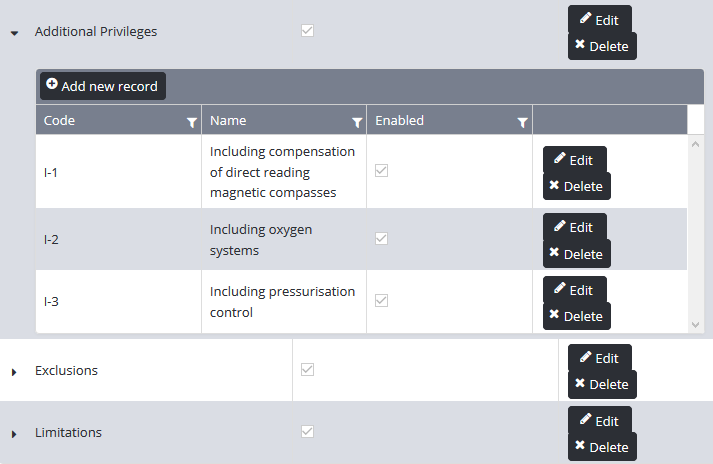
Click [Add New Record]
 . A new row is displayed in the endorsement attribute type grid.
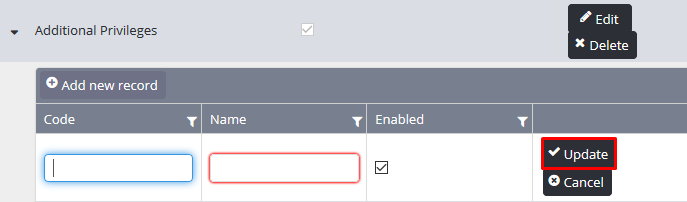
Enter the code for the endorsement attribute type in the Code text box.
Enter the name for the endorsement attribute type in the Name text box.
Select the Enabled tick box if you wish the endorsement attribute type to be active and usable. If the Enabled tick box is unselected, the endorsement attribute type will be inactive and unusable.
Click [Update]
 . The grid is updated with the new endorsement attribute type.
Repeat Steps 8-13 to add additional endorsement attribute types.
...