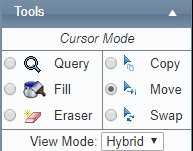
The Move tool [![]() ] allows you to move selections of the roster to the current user or to other users.
] allows you to move selections of the roster to the current user or to other users.
Step-by-step guide
Select

...
Select Operations > Scheduling > Operations >
 Roster. The Online Roster screen is displayed in a new window.
Click Expand [

 ] for the required base location and department.
- Select the Move tool [
 ] in the Tools pane.
- Left-click the required shift code in the Calendar pane. The direction cursor is displayed.


Move the cursor to the left or right to select the required days.

Hold Shift on your keyboard and left
Left-click when the expanded selection meets the requirements.
- Left-click the required beginning location in the Calendar pane.
Move cursor to the required section of the roster to place the shifts.
Double left
Left-click to place the section of shifts.


Related articles
| Filter by label (Content by label) | ||||||||||||||||||
|---|---|---|---|---|---|---|---|---|---|---|---|---|---|---|---|---|---|---|
|
...
| Page Properties | |||
|---|---|---|---|
| |||
|